
Managing file formats
Unlike databases, files typically do not have built-in metadata to describe the format of the fields in the file, so this information must be provided to Delphix. This is done through the Settings tab, where a menu item is available on the left Data Formats. Click on Data Formats to see tabs for File and Mainframe and a button to add a format.

The formats on the screen can be filtered or sorted by the various informational fields, by clicking on those respective fields. More information on grid filtering and sorting can be found on the Graphical user interface page.
The file inventory relies on the file format it represents. As a result, any changes to the file inventory affect all data files using that file format. Thus, altering the file inventory impacts all files conforming to that format across the application. This is applicable to all the file types Fixed-Width, Delimited, Mainframe, JSON & XML.
Assigning file formats to files
When creating a rule set, you have the option to assign a file format to a file or set of files that you are incorporating into the rule set. It is essential to assign an appropriate file format to the data files.
You can change the file format for a file or set of files already in the rule set by editing the rule set. In the Edit Rule set wizards second step Data Files, select required file(s), clicking on the Edit Selected button, an Edit File Properties pop-up window will appear. There is a drop-down to select the proper format for the file(s) selected.

If the file is a Mainframe data set with a copybook, you will see a checkbox to signify if the file is variable length.
For all other file types, select the end-of-record to let the Continuous Compliance Engine know whether the file is in Windows/DOS format (CR+LF) or Linux format (LF). If the file is a delimited file, there will be a space to put in the delimiter. If there are multiple files in the rule set, you will have to edit each one individually and assign it to the appropriate file format.
Record types
Record types can be used to perform conditional masking of the file records. If a file has a different set of records spread across multiple rows, the Continuous Compliance Engine should be able to understand all the unique records.
Take an example where a file has the following records in the first three columns of each row; first name, last name, and age – but the last column of each row has a unique record like IP address, ethernet address, etc. In this case, you would need to create a new record type for every unique record present in the file and assign a specific file format to all of the record types. For more information on adding a record type, see the Managing record types and header/footer records page.
Record types can only be managed via the Formats page. The Inventory page does not allow adding, updating, and deleting record types.
Redefine conditions
For Mainframe data sets, the File Format screen allows for the entry of redefine conditions, which are used to handle any occurrences of COBOL's REDEFINES construct that might appear in the copybook. In COBOL, the REDEFINES keyword allows an area of a record to be interpreted in multiple different ways. In the example below, each record can hold either the details of a person (PERSON-DET) or the details of a company (COMP-DET).

In order to do any masking, however, the Continuous Compliance Engine must be able to determine (for each record) which fields should be read for the correct algorithms to be applied. In order to do this, the Continuous Compliance Engine uses redefined conditions, which are specified in the format. Redefine conditions are boolean expressions that can reference any fields in the record when they are evaluated.
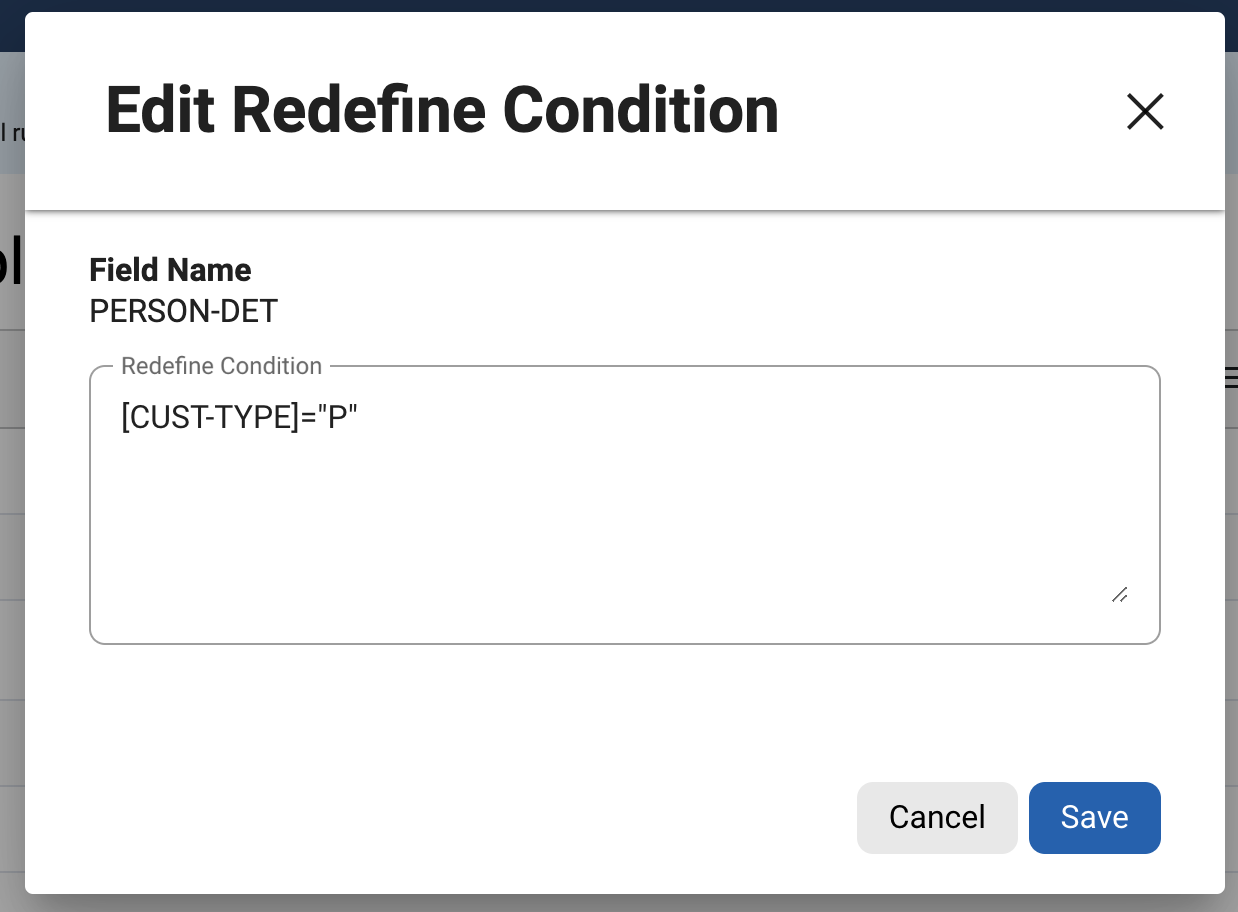
In the example copybook above, the field CUST-TYPE is used to indicate which group is present. If CUST-TYPE holds a 'P', a PERSON-DET group is present, and if it holds a 'C', COMP-DET is present.
This can be expressed in the inventory by specifying a redefine condition with the value [CUST-TYPE]='P'. This expression indicates that, for each record read from the source file during the masking job, the value of the field CUST-TYPE should be read and compared against the string 'P'.
If it is equal, the Continuous Compliance Engine will read from the record the fields subordinate to PERSON-DET and will apply any masking algorithms specified on those fields. Similarly, a redefine condition with the value [CUST-TYPE]='C' should be applied to the COMP-DET field. Exactly one of the conditions should be evaluated to true for each group of redefined fields.
For example, a copybook might have fields A, B REDEFINES A, and C REDEFINES A. Of the Redefine Conditions attached to A, B, and C, one and only one should be evaluated to be true for each record.
Entering a Redefine condition
In the Format page for the file, click the Actions (…) button to the right of the corresponding field with a REDEFINED or REDEF type, then select the Edit Redefine Condition option
 – an edit window will appear.
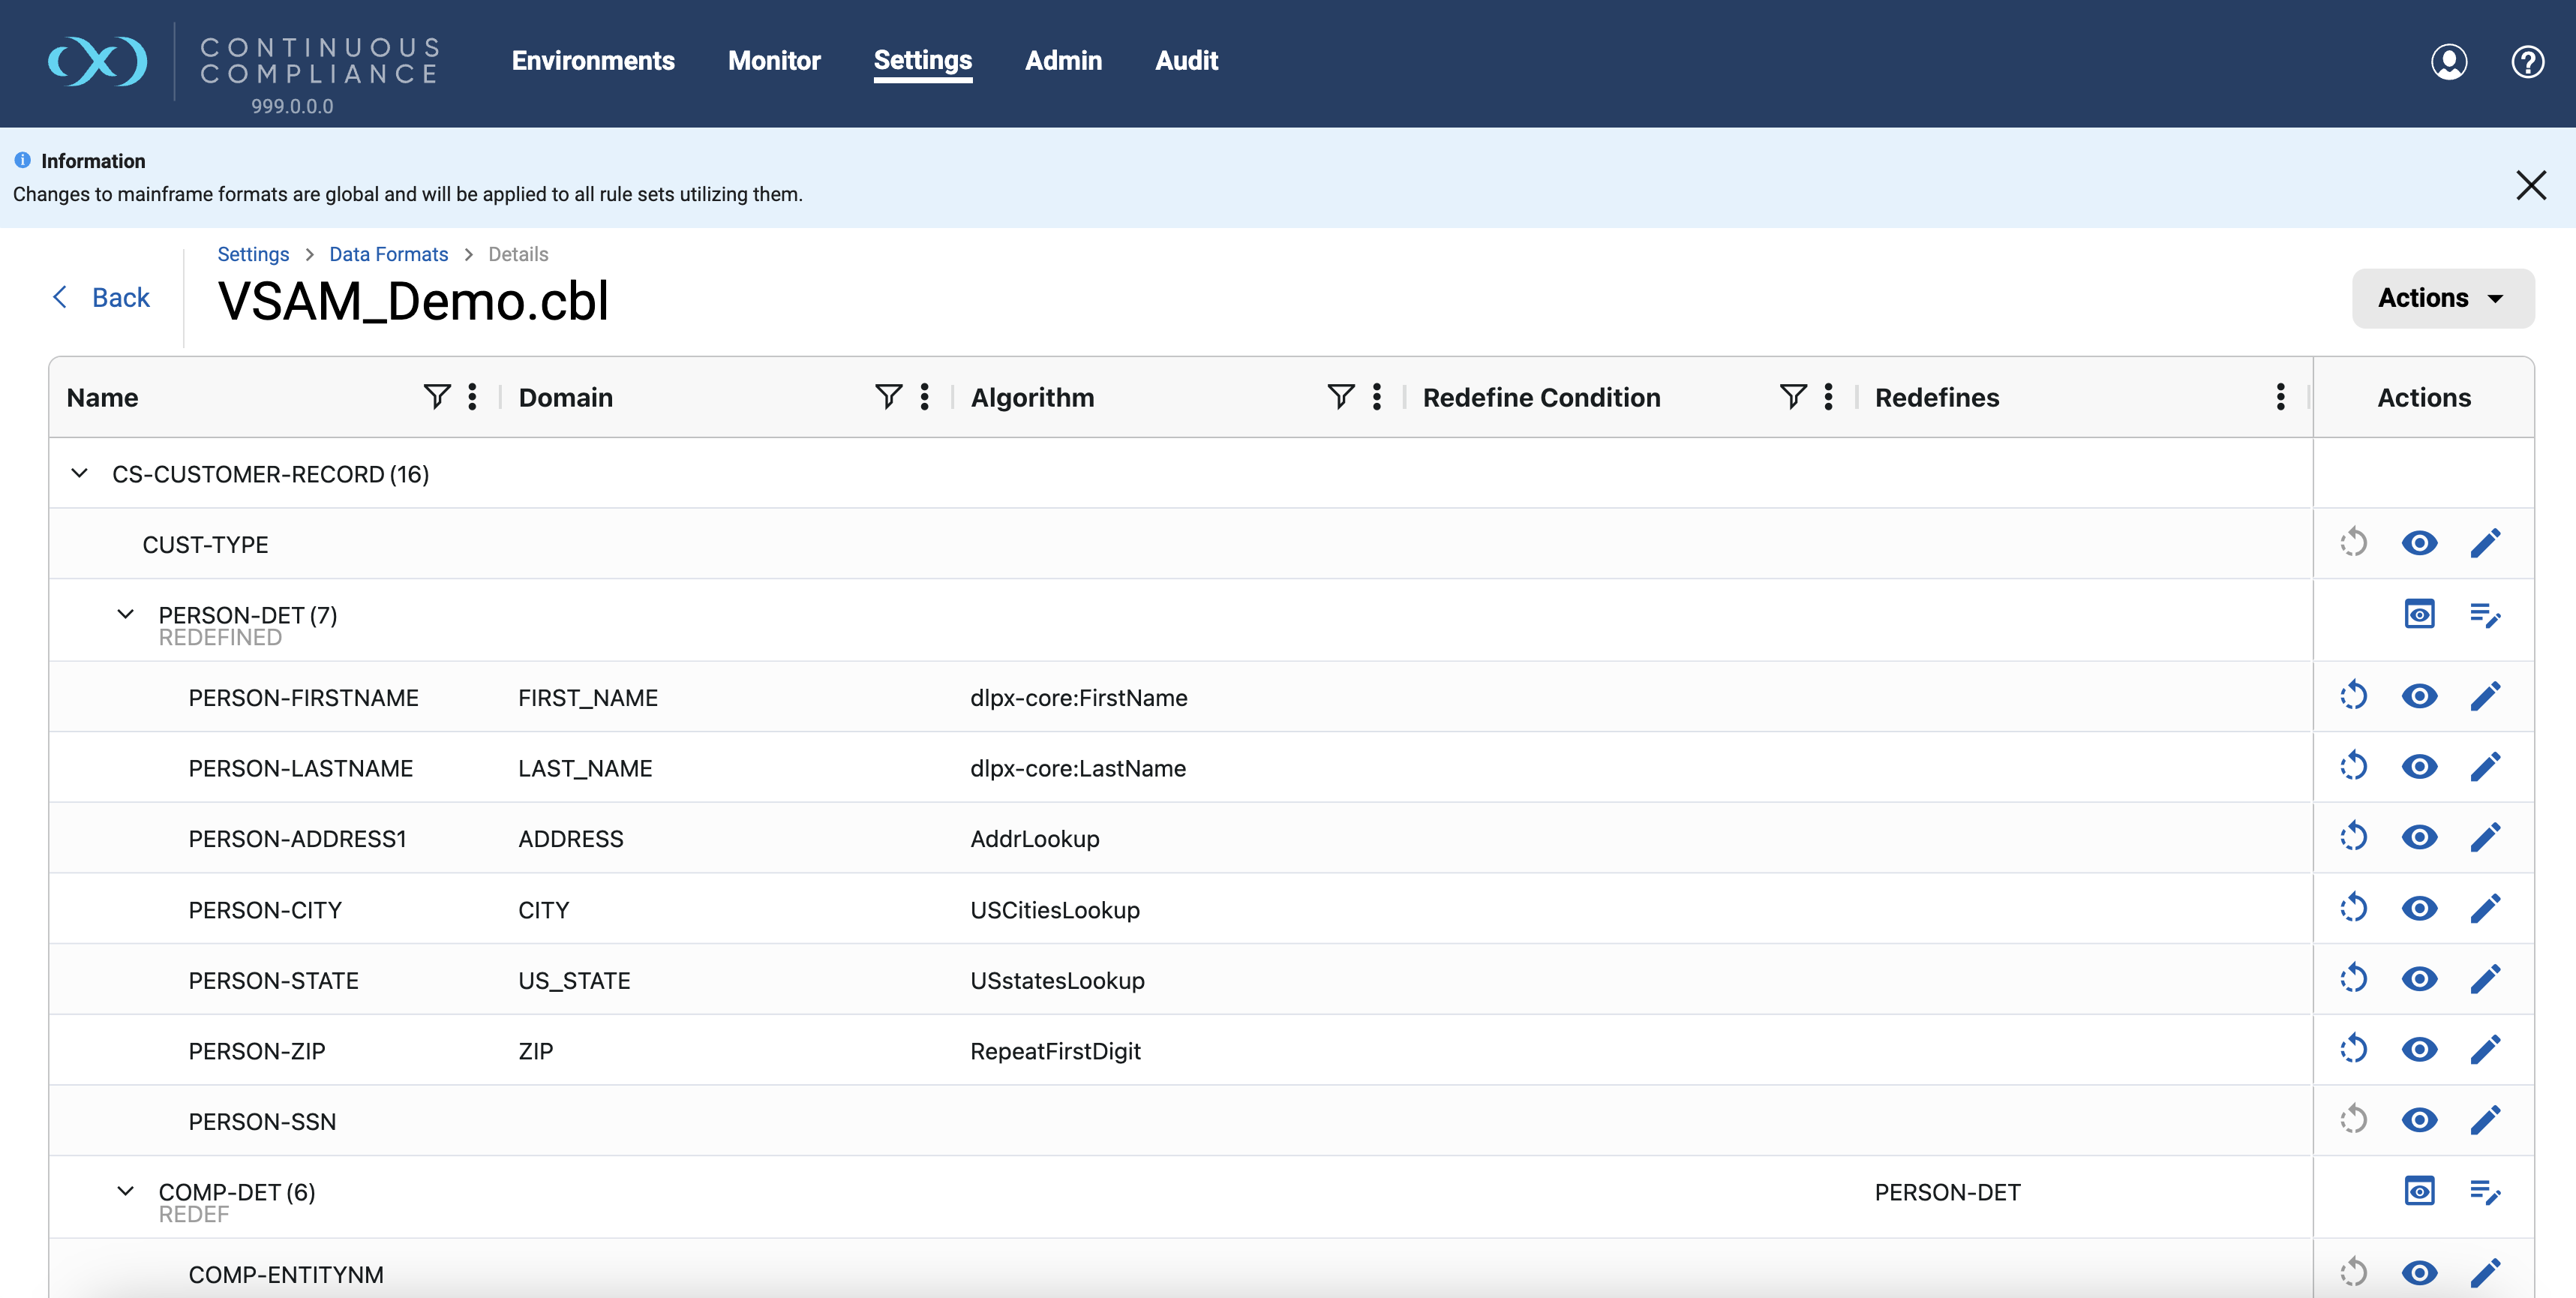
Enter a condition in the text box that appears. This is the expression that, when evaluated to true, causes the subordinate fields to be read and (if they have algorithms assigned) masked.
Click Save.
For viewing Redefine Condition select
 icon under the Actions column.
Redefine conditions can be managed only via the Formats page, the Inventory page for Mainframe does not allow adding and updating redefine conditions.
Format for redefine conditions
Redefine conditions allow fields to be compared against either number or string literals. Square brackets [ ] enclosing a field name indicate a variable, which takes on the value of the named field:
[Field1] = 'An example String'String literals can be enclosed in either single or double quotes. For fields that are numeric (e.g. PIC S99V9), the operators <, <=, >, and >= can be used in addition to the =operator:
[Field2] <= -10.5Also, conditions can be joined using AND, OR, and NOT to form more complex conditions:
([Field3] > 2.5 AND [Field3] < 10) OR NOT [FIELD4] = 'Z'