
Add file fields
New file fields can only be defined in delimited, fixed-width, and JSON file formats. Use the following steps to create a new field.
-
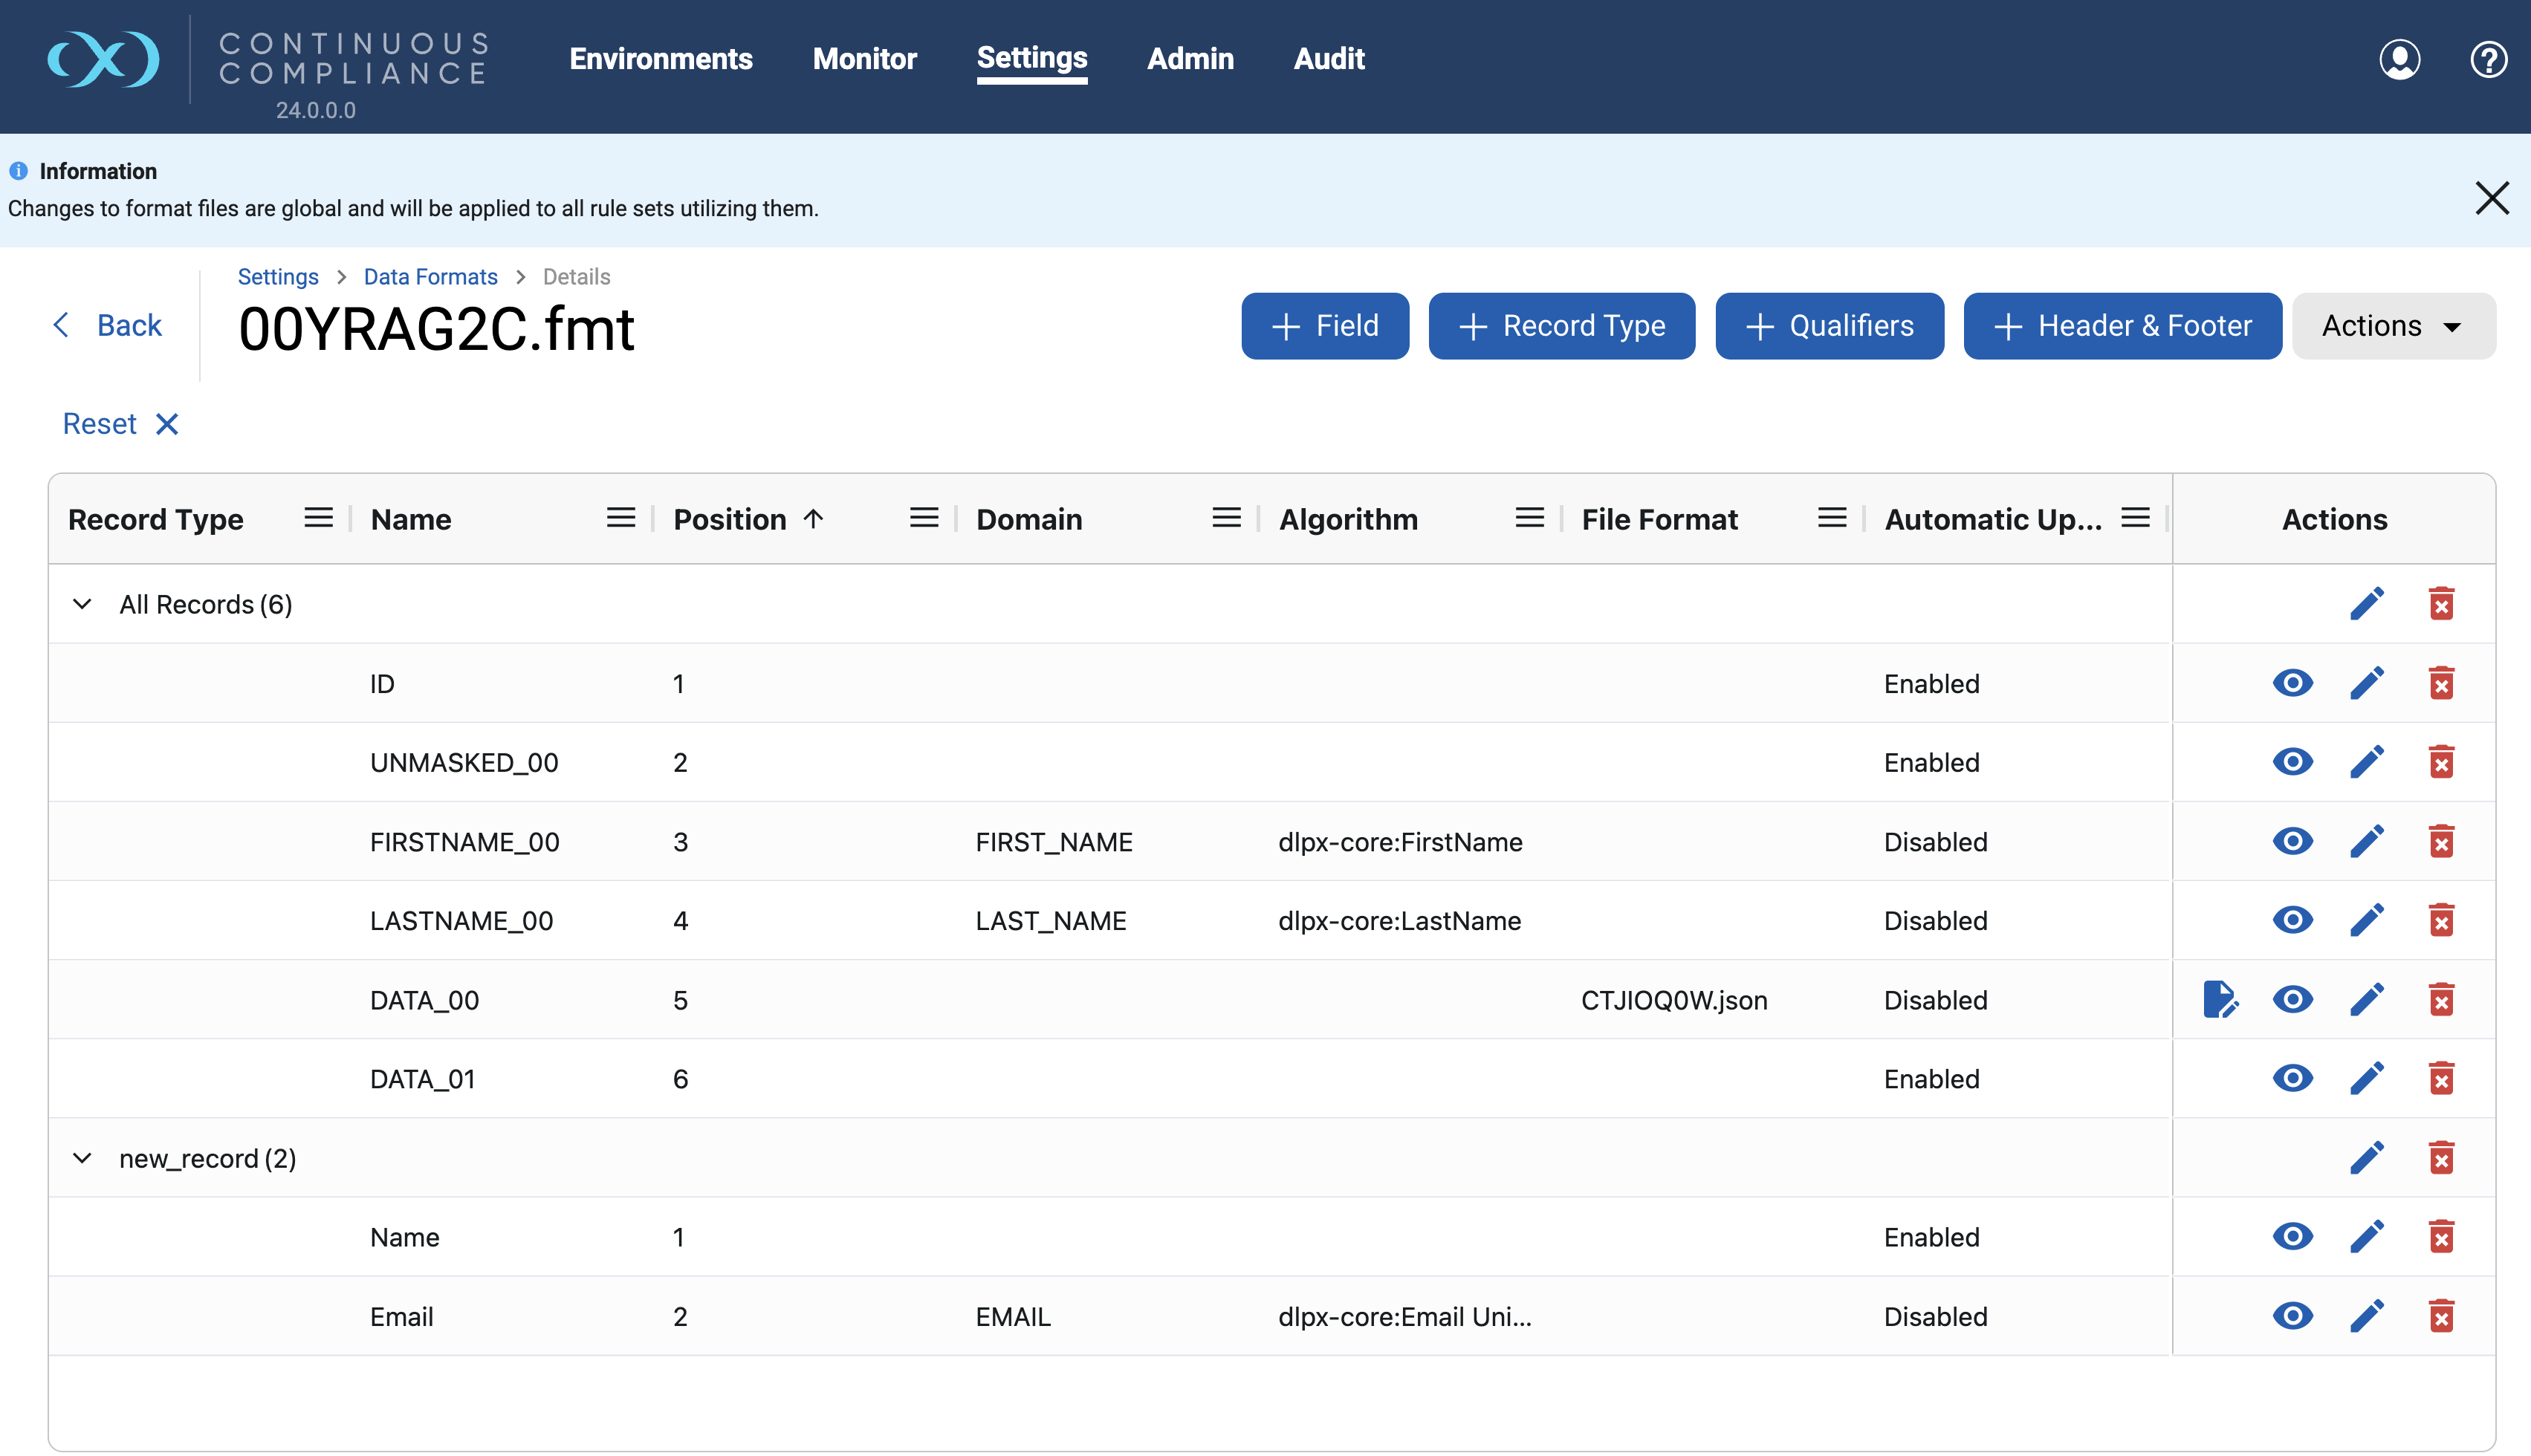
Navigate to Settings → Data Format, click the hyperlink of a format Name from the corresponding column. From there, an inventory-like screen will be available with several listed fields.
You can also navigate to the Data Format page from any Rulesets Inventory screen by clicking on the Edit File Format button. An information banner is added on the Environments Inventory page to help user with navigation.
-
Click on + Field button appearing on the left corner just above the grid, to open an Add Field dialogue.
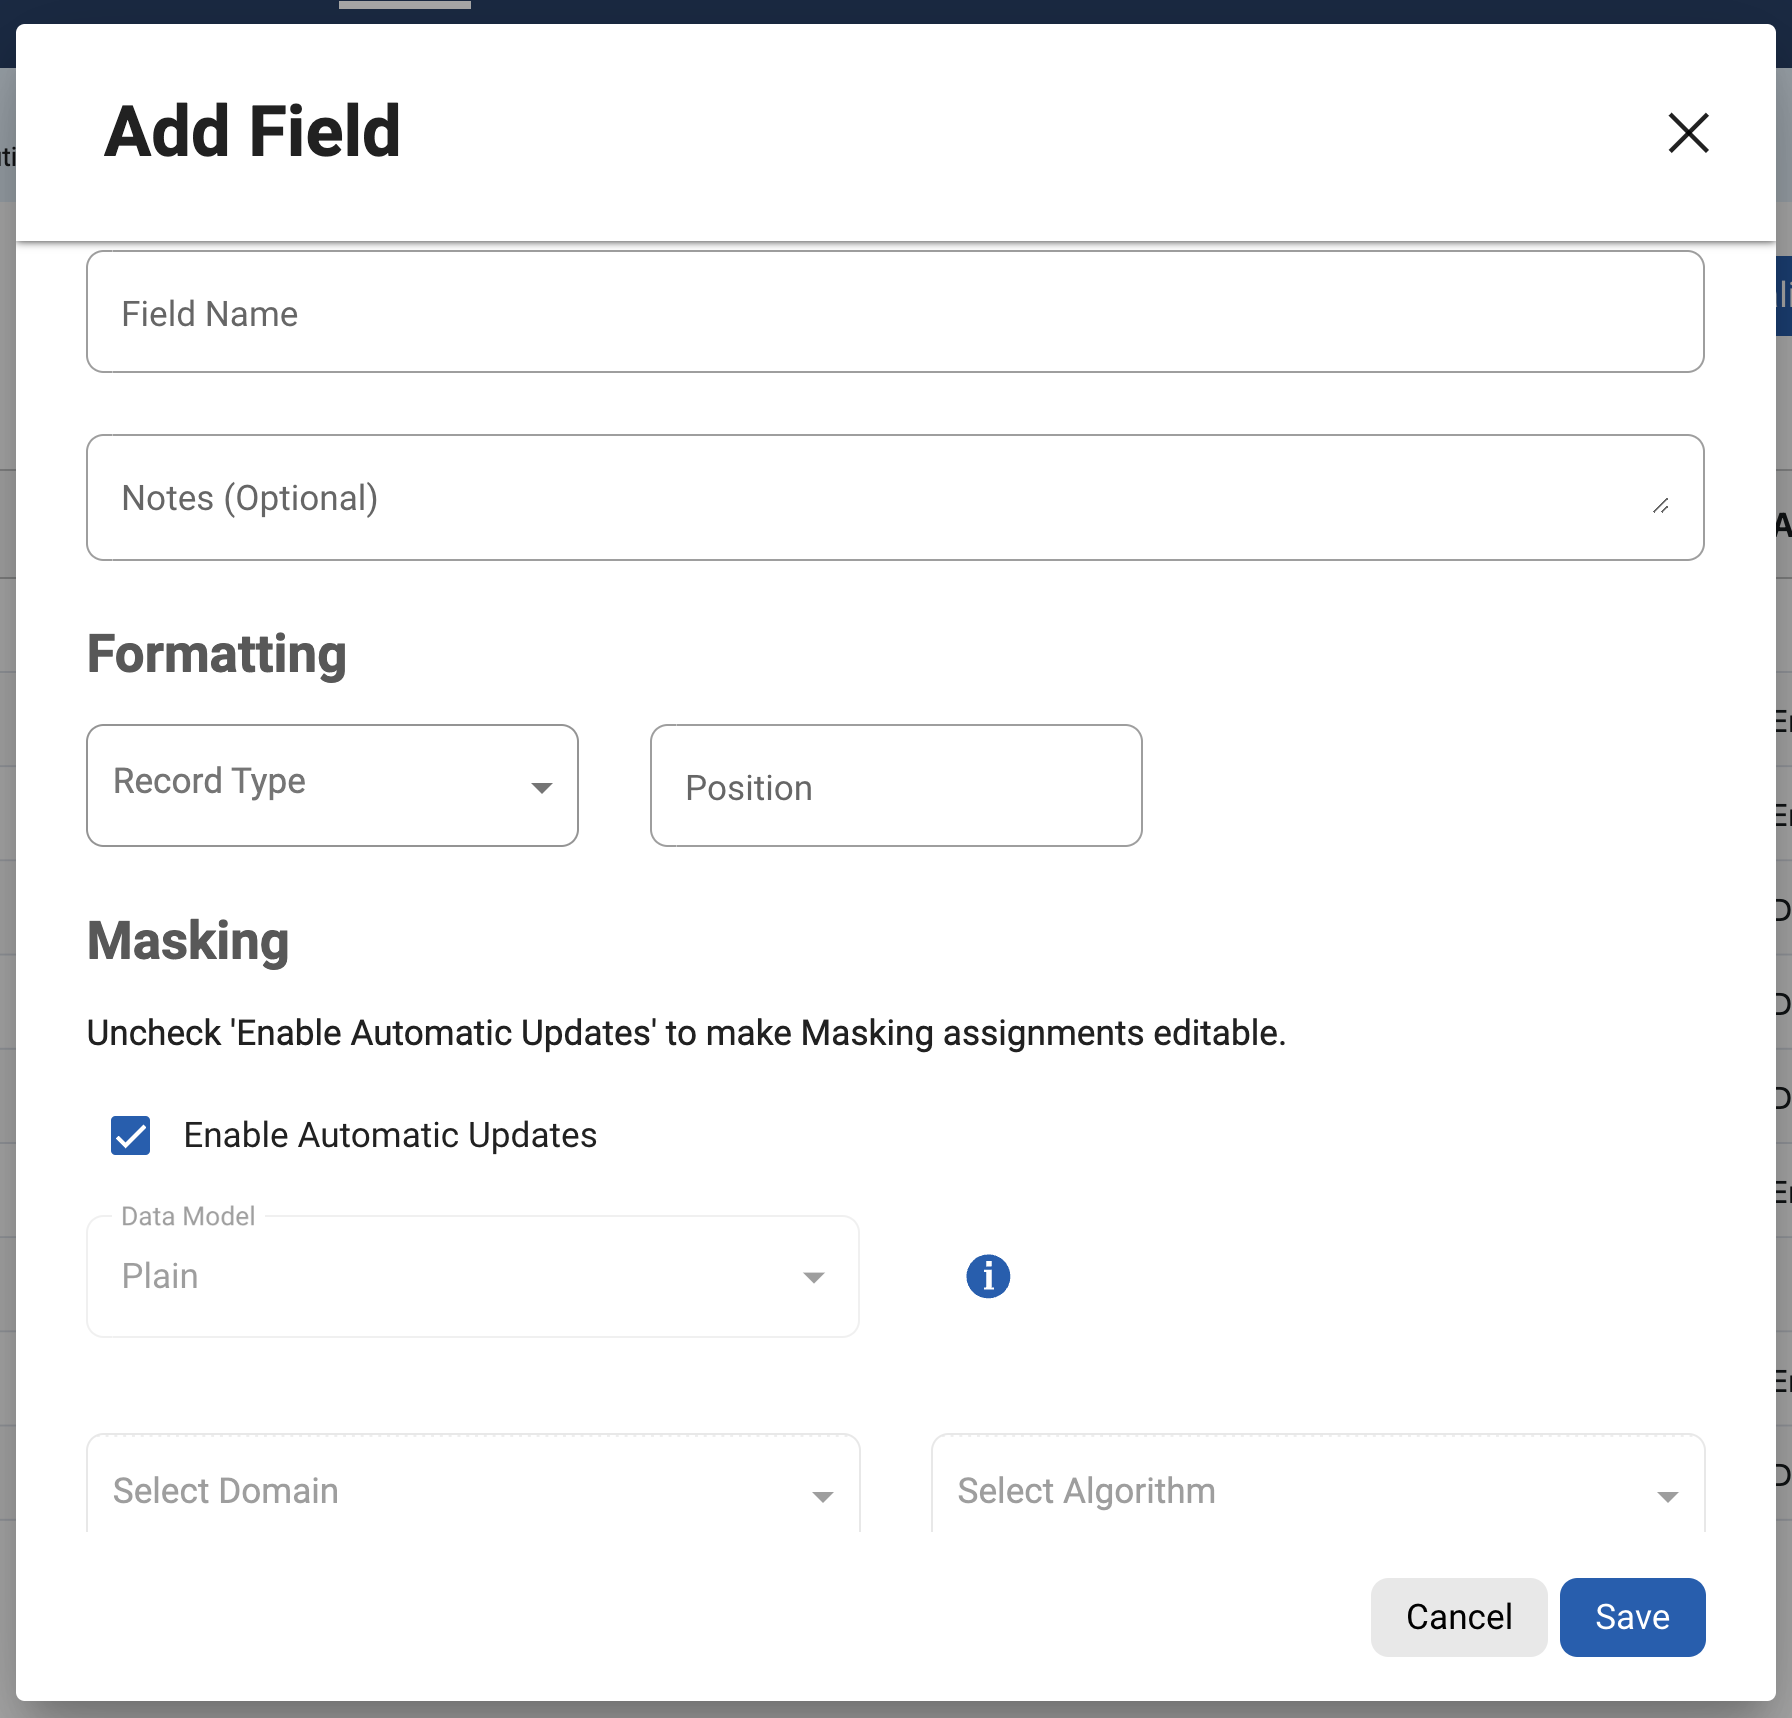
If you select a DATESHIFT algorithm or multi-column algorithms, more fields will appear in the dialogue. A DATESHIFT algorithm allows you to pick a date format from the dropdown list or specify your own date format.
-
Fill out the form and click Save.
-
The Field Name or JSON Path and all inputs in the Formatting section are mandatory.
-
The Masking section is optional and can be edited later as well.
-
Newly added fields will be reflected under the selected record type group on the page.
-
Enable Automatic Updates will always be checked by default. Generally, If the user is making masking assignments then they don’t want assignments to be overridden by the Profiler. To make masking assignments uncheck ‘Enable Automatic Updates’.
-
Users can uncheck ‘Enable Automatic Updates’, update masking assignments, and then check if they want to set the domain and algorithm but still allow the Profiler to change the assignment.
View, edit, or delete a file field
-
The fields can be viewed, edited, or deleted using the Actions to the right of the corresponding field.
-
View -

-
Edit -

-
Delete -

-
Edit File Format -

A field’s masking settings ( automatic updates setting, domain assignment, and algorithm assignment) can also be edited from the Inventory screen.